- Overview
- Installing Theme and Plugins
- Demo Content Installation
- Getting Started
- Theme Options
- Sidebars / Widgets
- Setting the slider
- Setting the pages
- Setting the Blog
- Setting the Portfolio
- Setting the Team Members
- Setting the Testimonials
- Setting the Client's Logo
- One-page site
- Visual Composer
- Setting WPML Multi-Lanuage
- Translation
- Shortcodes
- FAQ
- Sources / Credits
FAQ
Freqently Asked Questions
This page contains solutions for general questions
Questions List
Q1: How to set Contact Forms alike Demo site ?
A1: You can easily set Contact Form alike form shown on our demo site. Here are list of forms used on our demo site.
Sample code for Send Message Form used on Contact Us of Kiditos demo site.
<div class="tm-commonform tm-getin-touch-form">
<div class="row">
 <div class="col-md-6">[text* your-name placeholder "Your Name*"]</div>
<div class="col-md-6">[text your-phone placeholder "Your Phone*"]</div>
</div>
<div class="row">
 <div class="col-md-6">[email* your-email placeholder "Your Email*"]</div>
 <div class="col-md-6">[text* your-subject placeholder "Website URL"]</div>
</div>
<div class="row">
 <div class="col-md-12">[textarea* your-message 40x4 placeholder "Message"]</div>
</div>
<div class="row">
 <div class="col-md-12 tm-center-text">[submit class:tm-vc_general class:tm-vc_btn3 class:tm-vc_btn3-style-flat class:tm-vc_btn3-shape-rounded class:tm-vc_btn3-color-skincolor class:tm-btn-fullwidth "Send Message"][response]</div>
</div>
</div>
Q2: How to update Kiditos theme?
A2: We are providing regular bug fixes, enhancements and also features to our all buyers. So we are releasing new version frequently. The theme update process is handled by the Envato Market Plugin plugin. Click here to know how to setup Envato Market Plugin. You can download the plugin by clicking here.
Q3: How to find Kiditos theme Purchase Code ?
A3: The purchase code is a code that verifies that you are a genuine buyer. Here are steps to find your purchase code:Q4: How to set responsive menu breakpoint (from which window size the menu will become responsive) ?
A4: You can set it from
Admin > Kiditos Options > Menu Settings section. Just go to this section and select window size (or set pixel) under "Responsive Menu Breakpoint" option. See screenshot below: 
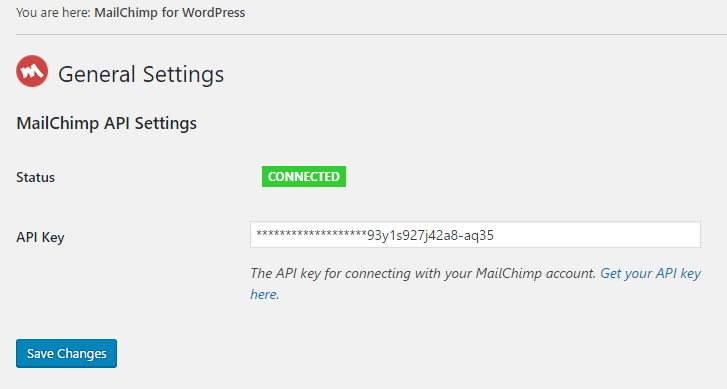
Q5: How to set MailChip newsletter form?
A5: We are using MailChimp for WordPress plugin to generate MailChip subscribe form in footer. So first install this plugin. Than follow steps given below:
- First make sure you link your MailChip account with this plugin. Just go to Admin > MailChip for WP plugin settings section and link your account. You just need to copy/paste the API code from your MailChimp account to here and click "Save Changes" button. See screenshot given below:
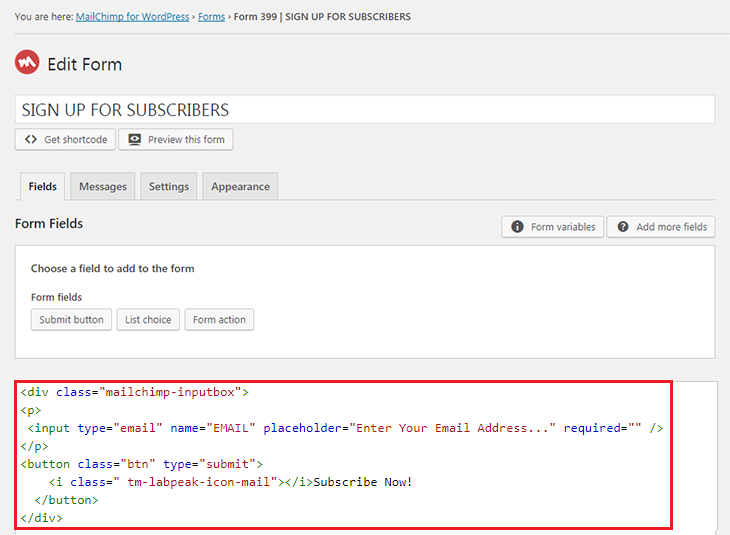
Now go to Admin > MailChip for WP > Forms section and paste this code:
<div class="mailchimp-inputbox">
<p>
<input type="email" name="EMAIL" placeholder="Enter Your Email Address..." required="" /></p>
<button class="btn" type="submit">
    <i class=" tm-kiditos-icon-mail"></i>Subscribe Now!
  </button>
</div>
Like this:
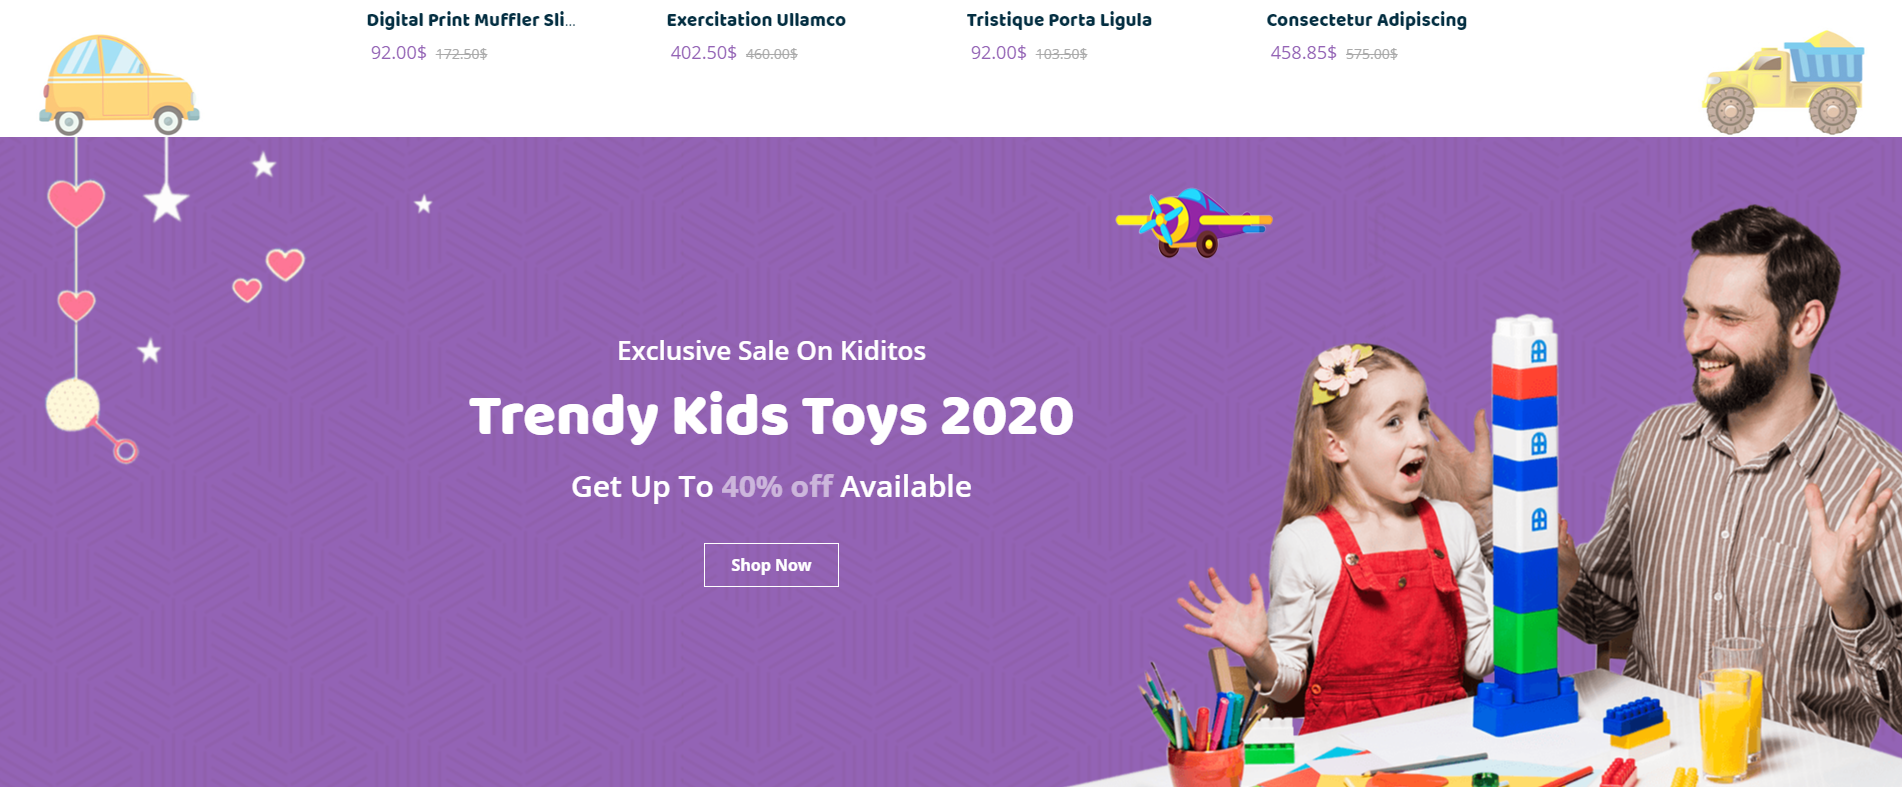
Q6:How to set Banner Cms Block alike demo on Homepage 1 in Demo site.

A6: For this you just need to add an extra class name
ttm_bannercms in the Main Row of ThemetechMount Banner Block Element. See screenshot below.

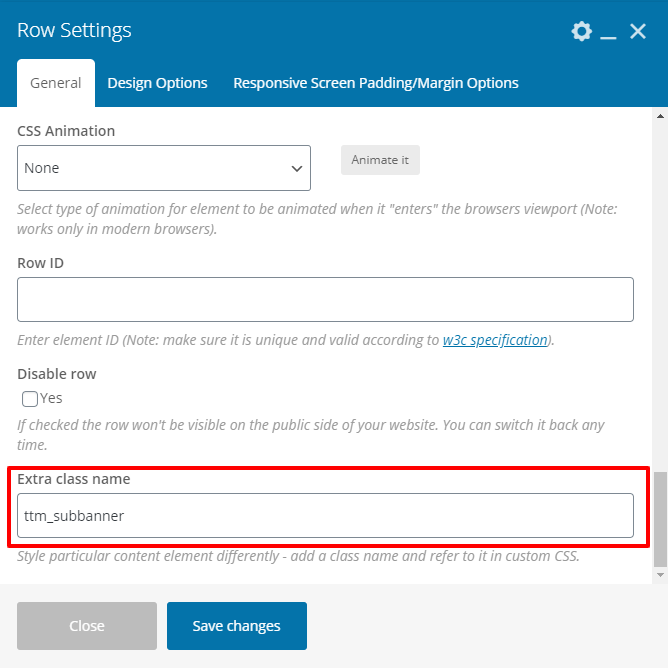
Q7:How to set Single Image Element alike demo on Homepage 1 in Demo site.
A7: For this you just need to add an extra class name
ttm_subbanner in the Main Row of Single Image Element. See screenshot below.
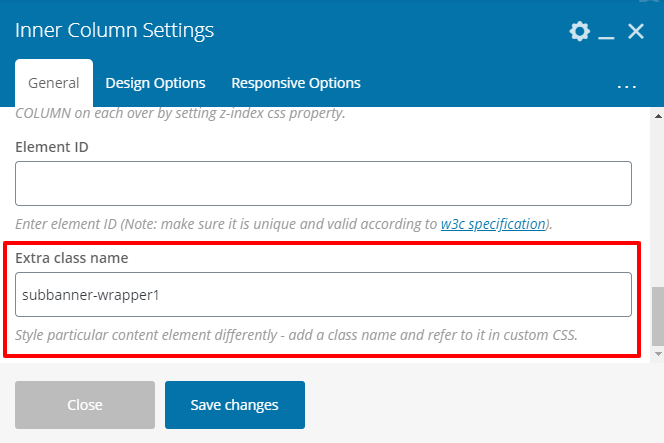
For this you just need to add an extra class name
subbanner-wrapper1 in Second Inner Column Settings. See screenshot below.
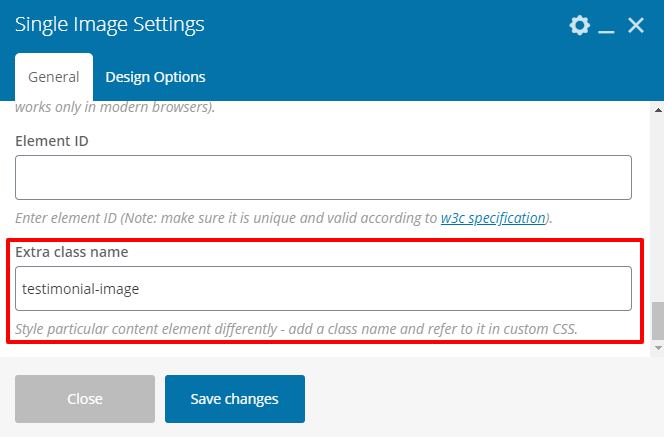
Q8:How to set Testimonial Box Element alike demo on Homepage 1 in Demo site.
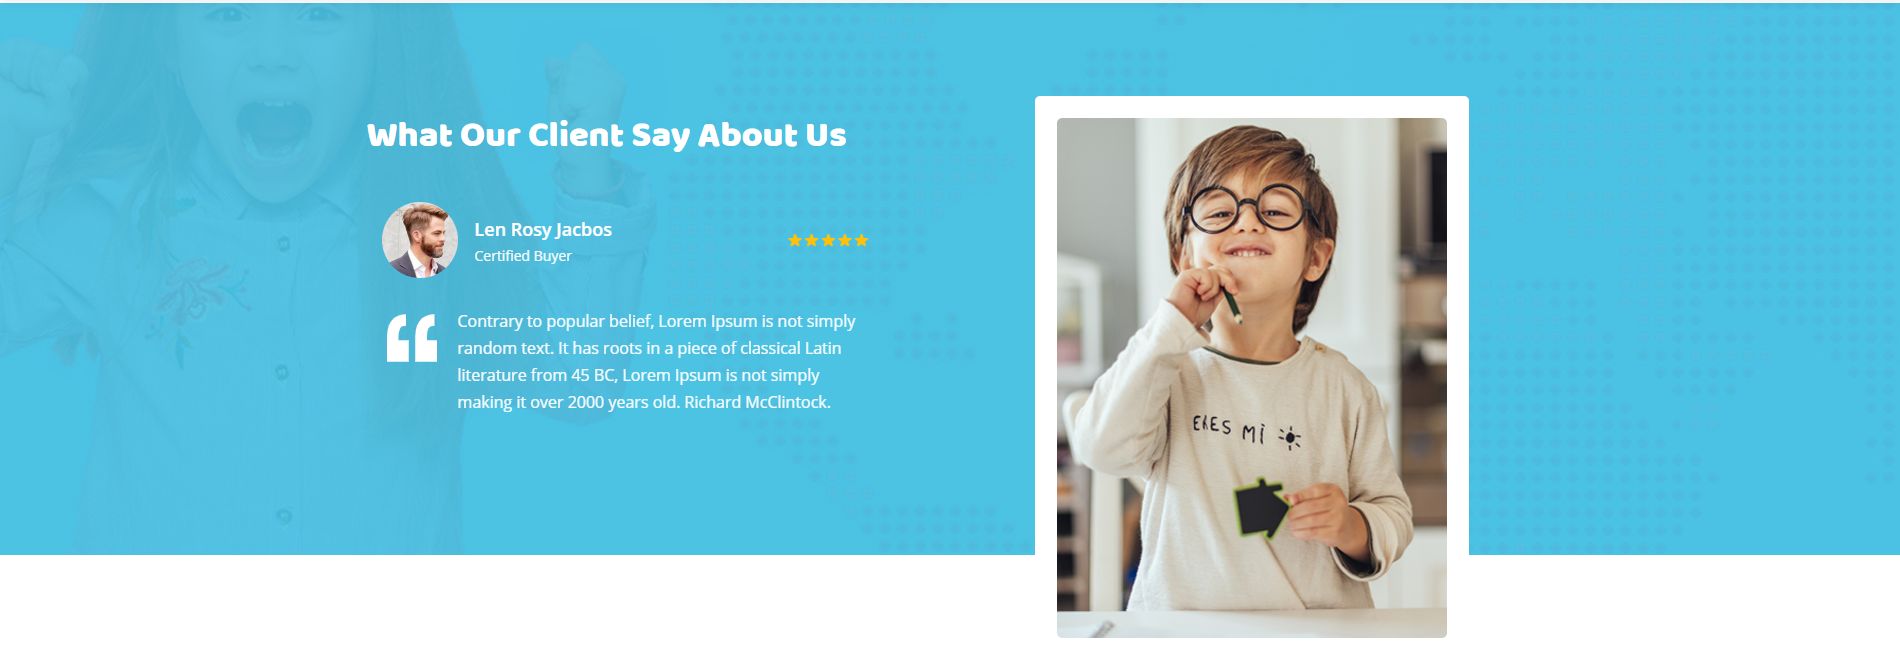
A8: For this you just need to add an extra class name
testimonial-image in Single image element. See screenshot below.
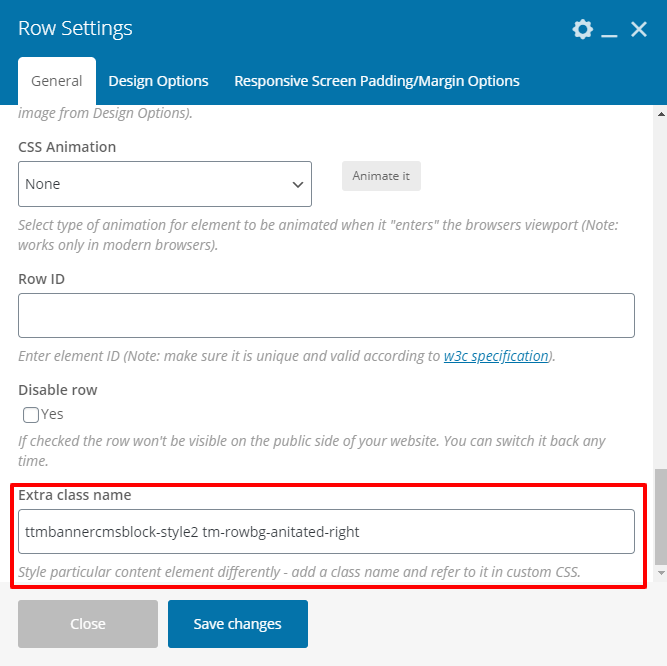
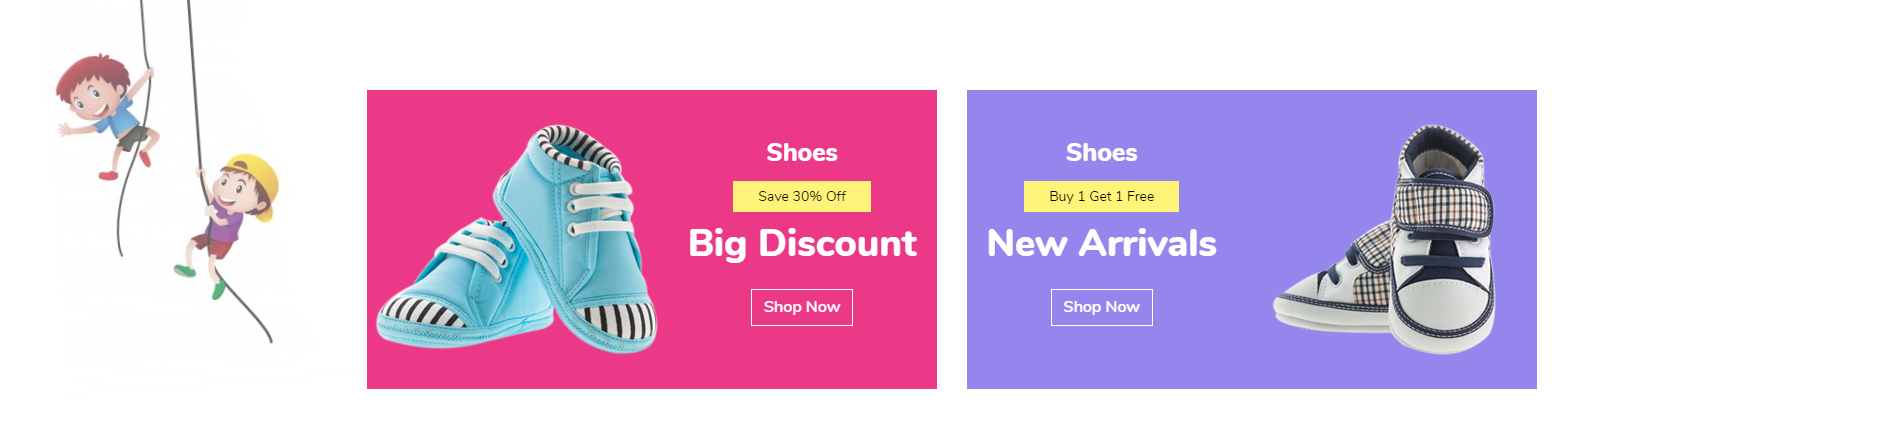
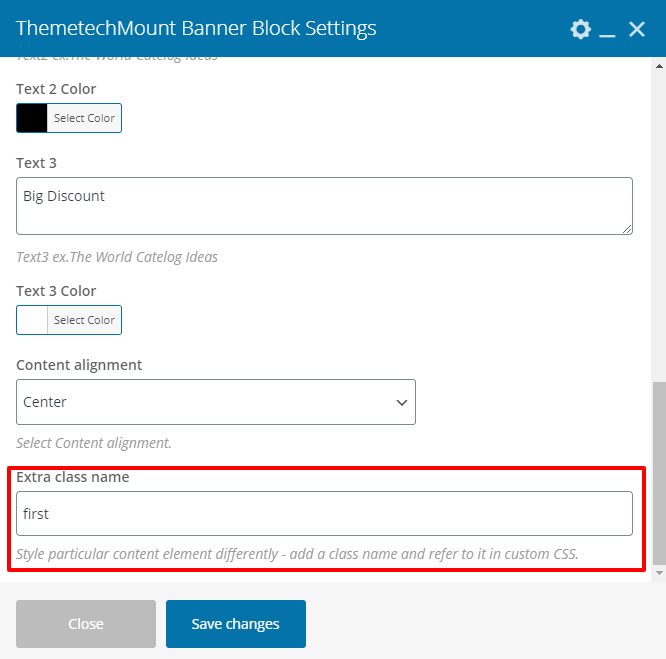
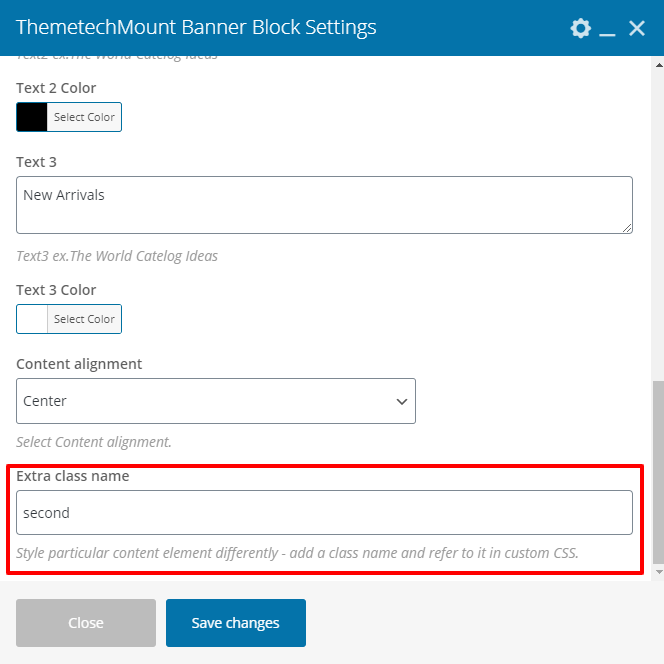
Q9:How to set Banner Block Element alike demo on Homepage 2 in Demo site.
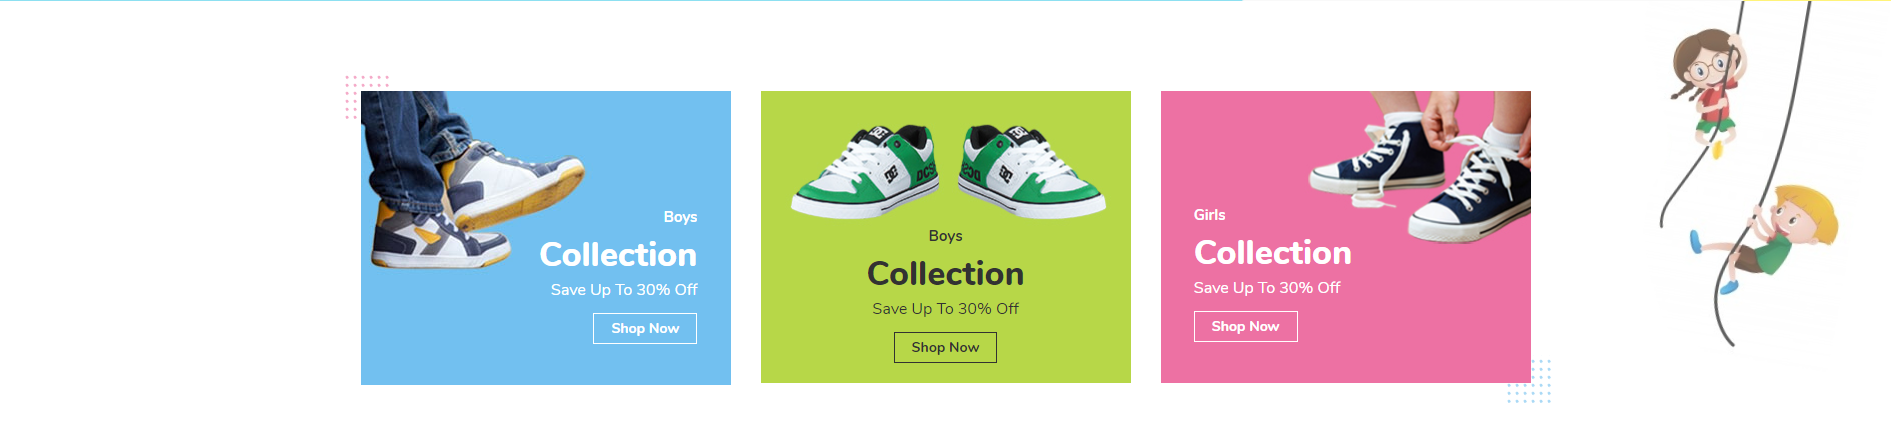
A9: For this you just need to add an extra class name
ttmbannercmsblock-style2 tm-rowbg-anitated-right in the Main Row of Banner Block Element. See screenshot below.
first in first Banner Block Element. See screenshot below.

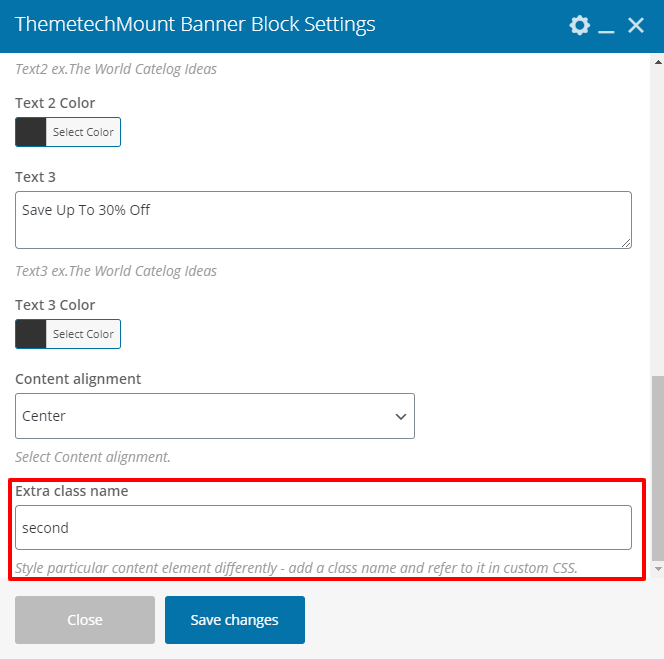
second in second Banner Block Element. See screenshot below.
third in third Banner Block Element. See screenshot below.

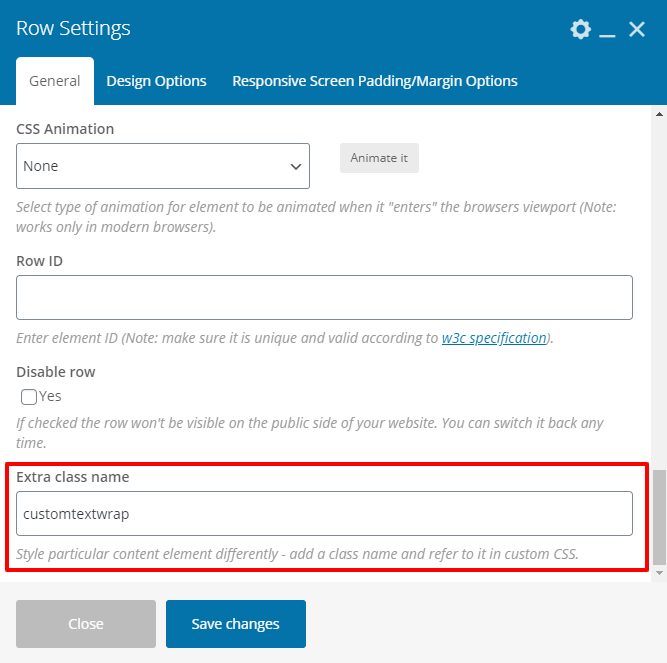
Q10:How to set ThemetechMount Custom Heading Element alike demo on Homepage 2 in Demo site.
A10: For this you just need to add an extra class name
customtextwrap in the Main Row of ThemetechMount Custom Heading Element. See screenshot below.
custom-text1 tm-reset-font-responsive in first ThemetechMount Custom Heading Element. See screenshot below.

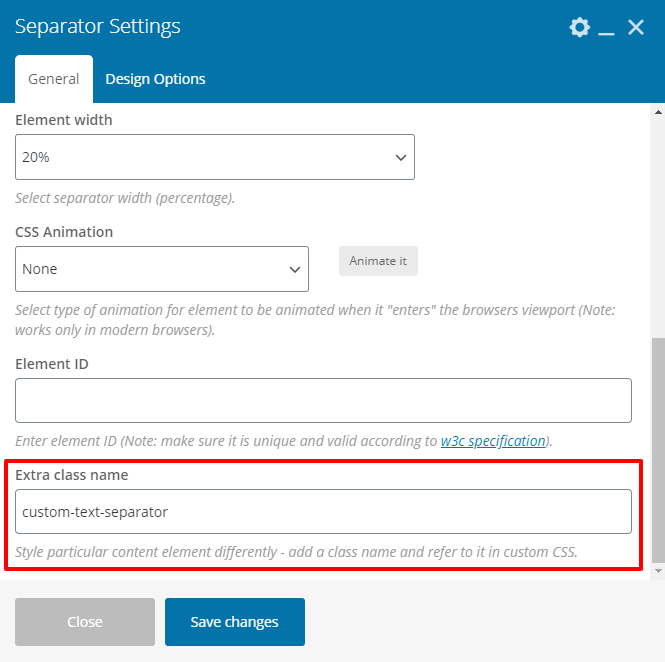
custom-text-separator in Separator Setting. See screenshot below.
custom-text2 in second ThemetechMount Custom Heading Element. See screenshot below.

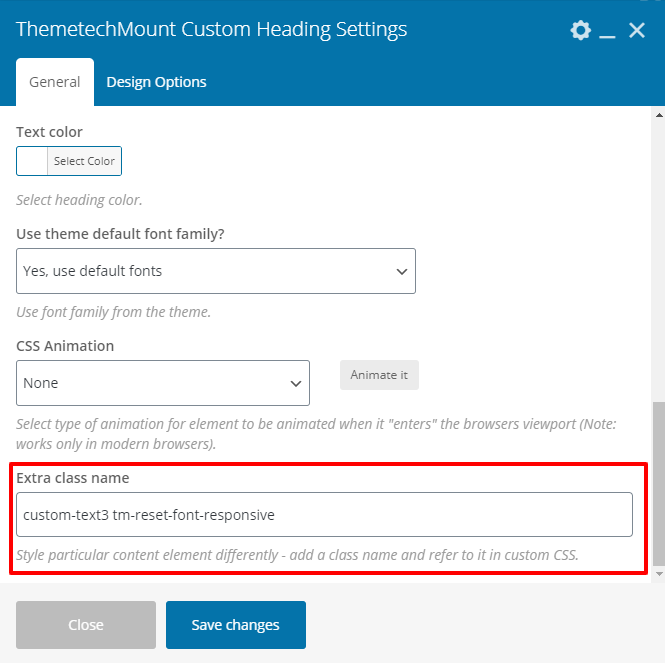
custom-text3 tm-reset-font-responsive in third ThemetechMount Custom Heading Element. See screenshot below.
Q11:How to set Banner Block Element alike demo on Homepage 2 in Demo site.
A11: For this you just need to add an extra class name
ttmbannercmsblock-style3 in the Main Row of Banner Block Element. See screenshot below.

first in first Banner Block Element. See screenshot below.
second in second Banner Block Element. See screenshot below.
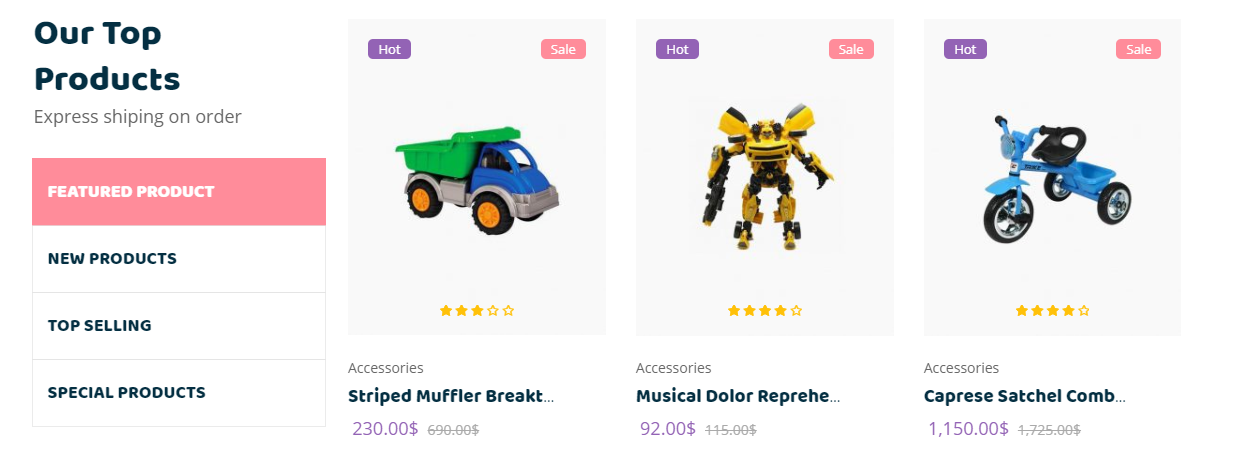
Q12:How to set ThemetechMount Hot Products Element alike demo on Homepage 2 in Demo site.
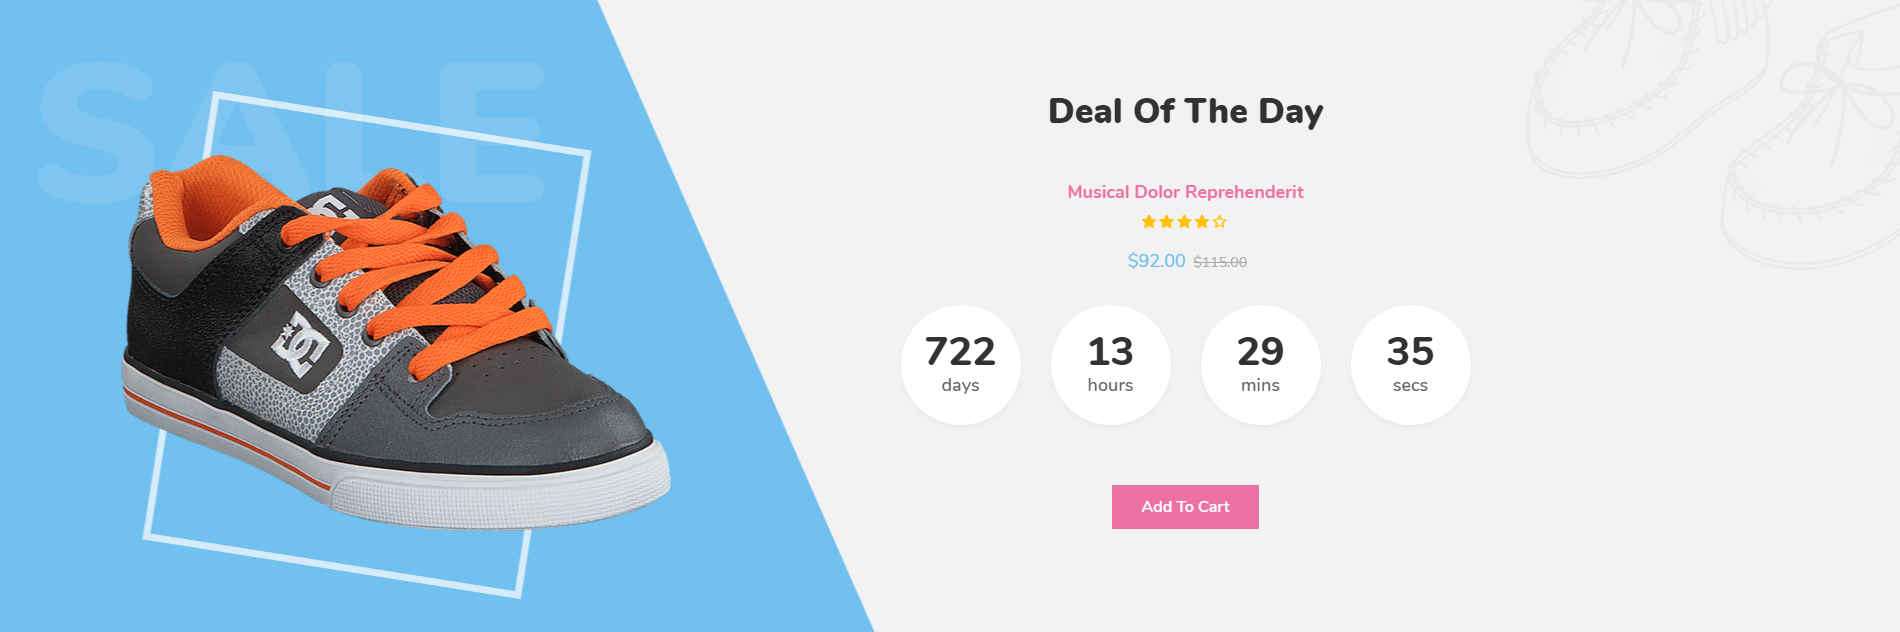
A12: For this you just need to add an extra class name
specialhotproducts in the Main Row of ThemetechMount Hot Products Element. See screenshot below.

Q13:How to set ThemetechMount Woo Categories Element alike demo on Homepage 3 in Demo site.
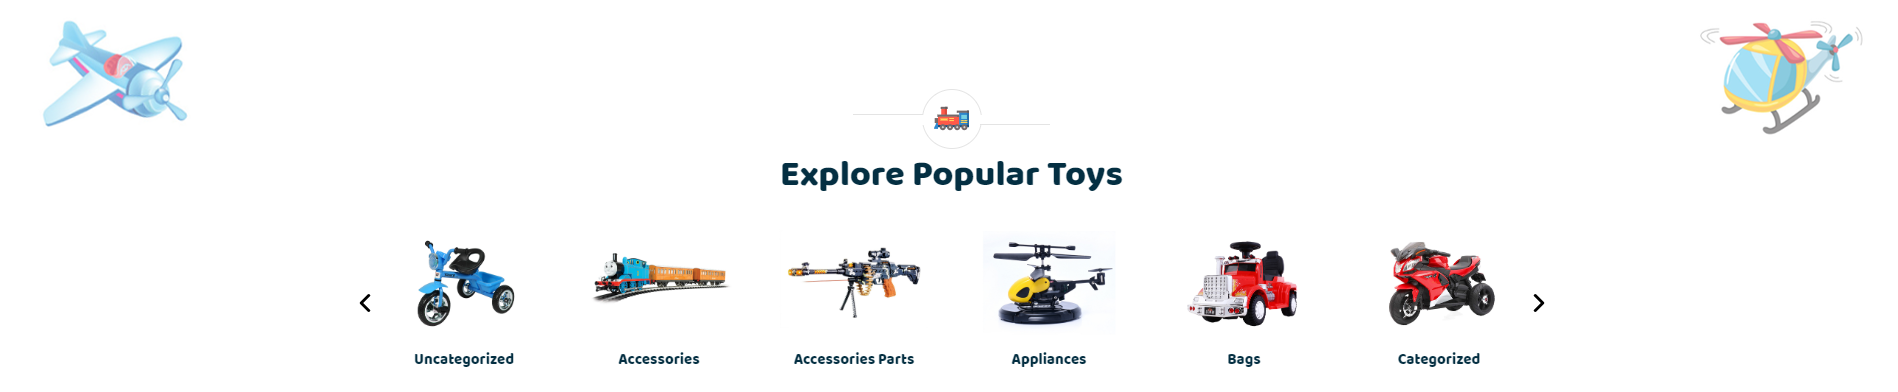
A13: For this you just need to add an extra class name
woocategoryblock in the Main Row of ThemetechMount Woo Categories Element. See screenshot below.

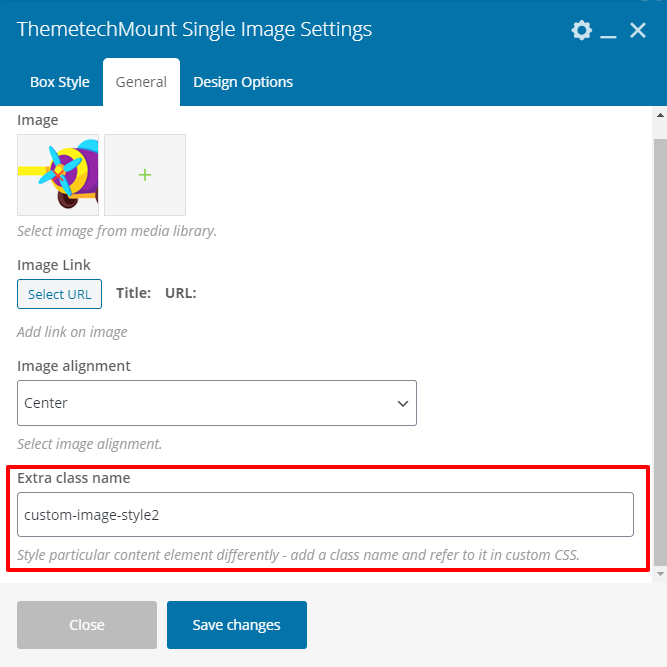
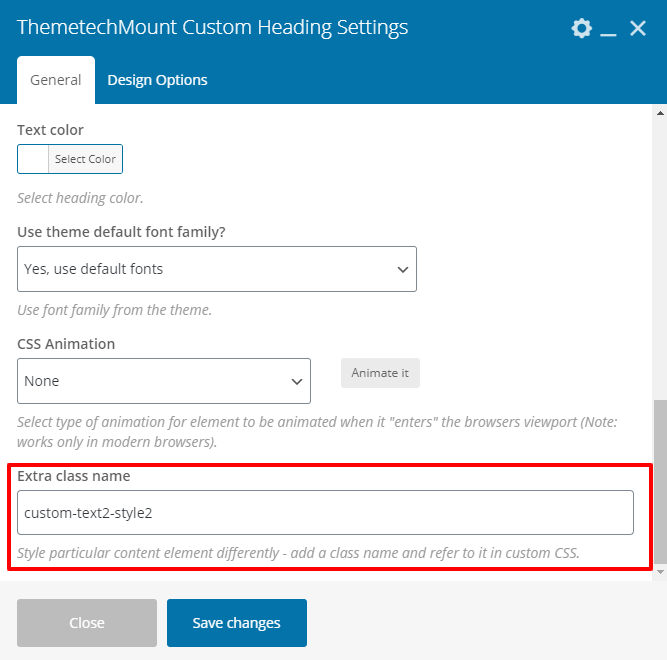
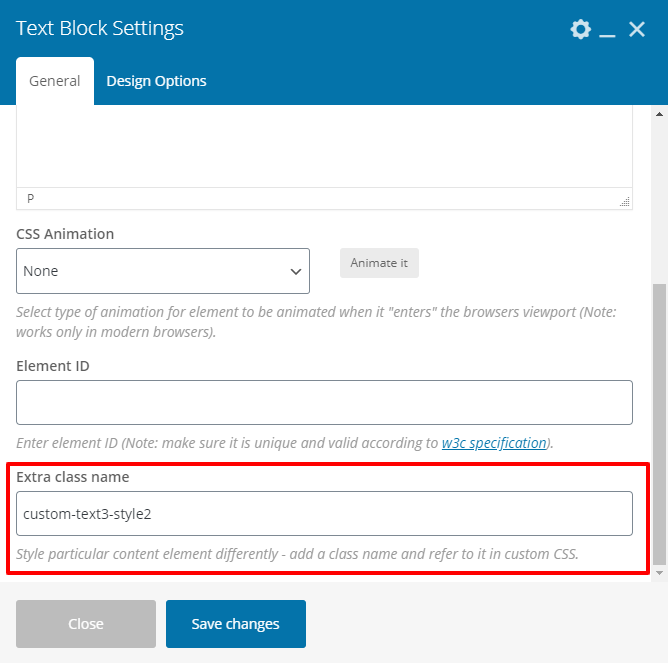
Q14:How to set ThemetechMount Custom Heading Element alike demo on Homepage 3 in Demo site.
A14: For this you just need to add an extra class name
customtextwrap in the Main Row of ThemetechMount Custom Heading Element. See screenshot below.

custom-image-style2 ThemetechMount Single Image Settings. See screenshot below.
custom-text1-style2 in ThemetechMount Custom Heading Element. See screenshot below.

custom-text2-style2 in second ThemetechMount Custom Heading Element. See screenshot below.
custom-text3-style2 in Text Block Settings Element. See screenshot below.
custom-text4-style2 in Text Block Settings Element. See screenshot below.

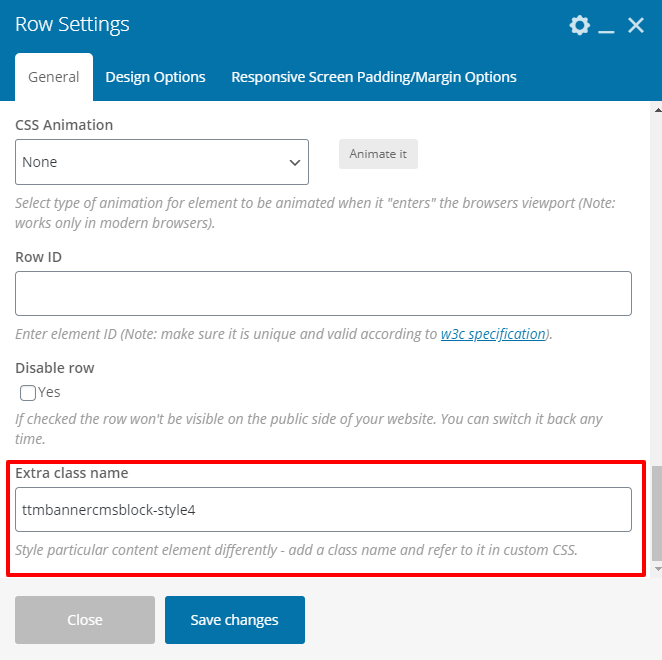
Q15:How to set Banner Block Element alike demo on Homepage 3 in Demo site.
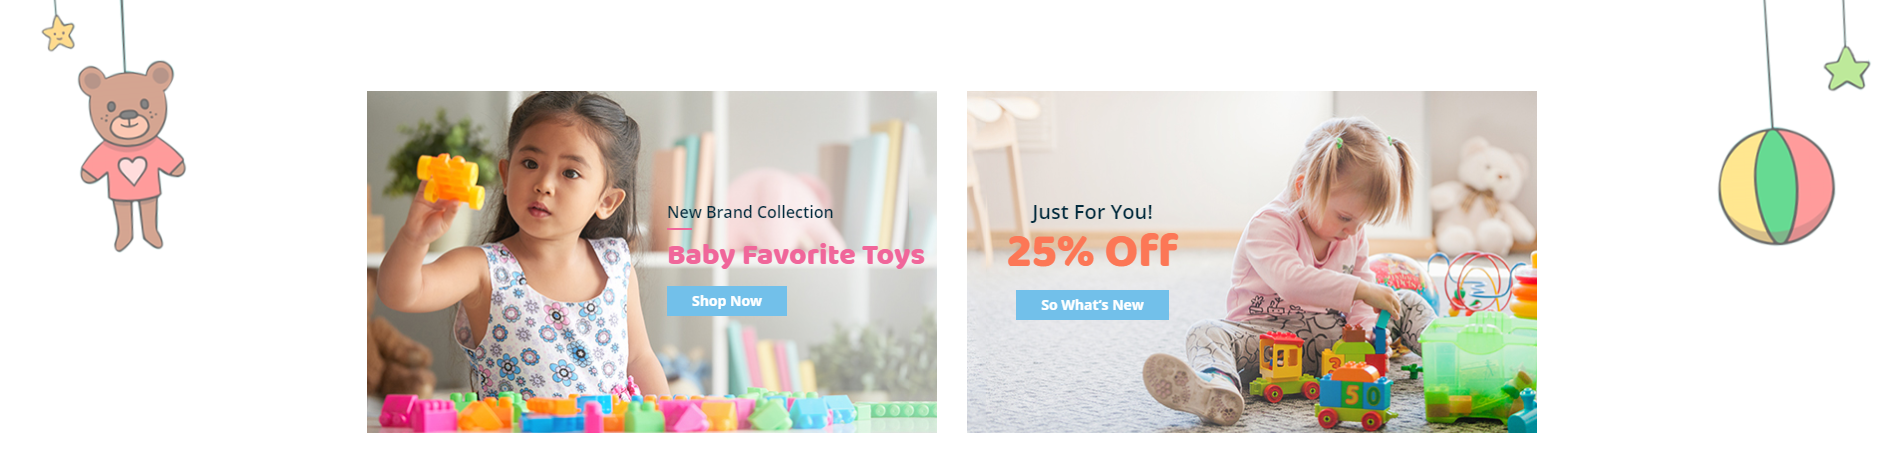
A15: For this you just need to add an extra class name
ttmbannercmsblock-style4 in the Main Row of Banner Block Element. See screenshot below.
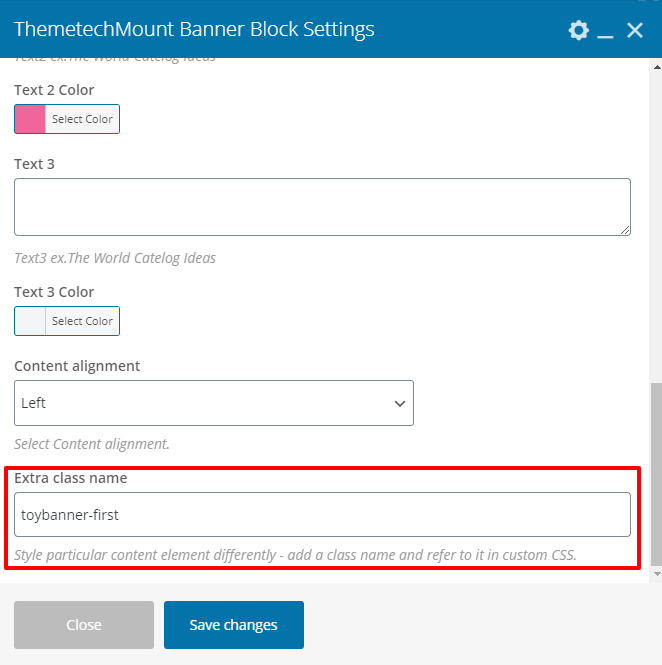
toybanner-first in first Banner Block Element. See screenshot below.
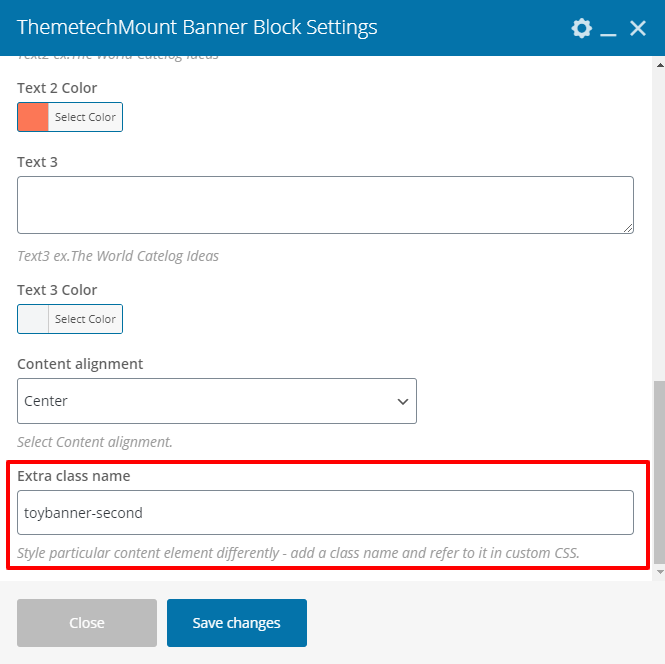
toybanner-second in second Banner Block Element. See screenshot below.
Q16:How to set Product Tab alike demo on Homepage 3 in Demo site.
A16: For this you just need to add an extra class name
toy-product-tab in the Main Row. See screenshot below.

Q17:How to set Header Banner alike demo on Homepage 1 in Demo site.

A17: For this you just need to add
Image Widget in Header Banner Widget Area. See screenshot below.
Follow this Path:
Admin > Appearance > Widgets

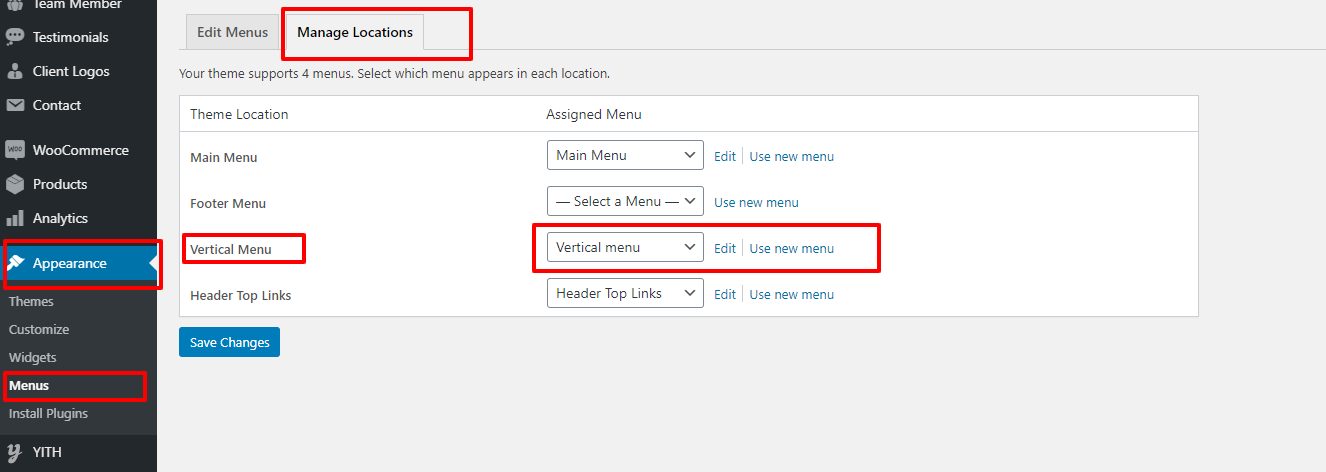
Q18:How to set Vertical Menu alike Demo site.
A18: For this you just need to select
Vertical Menu in Manage Locations in Menus. See screenshot below.
Follow this Path:
Admin > Appearance > Menus